The process of drywall finishing is a crucial stage in the construction and renovation of any interior space. Often regarded as an intricate art, drywall finishing involves a series of precise steps designed to transform the rough, unfinished drywall into a smooth, seamless surface that can withstand the test of time. For professionals and DIY enthusiasts alike, achieving a flawless drywall finish is a matter of both technique and patience. This guide delves into the complexities of drywall finishing, offering a detailed breakdown of each phase of the process, along with expert tips to help you achieve perfection.
Defining Drywall Finishing: A Detailed Overview
Drywall finishing refers to the application of joint compound, often called mud, to cover seams, screw holes, and imperfections on drywall panels. This process includes multiple stages of compound application and smoothing, with the end goal being a smooth, level surface that is visually pleasing and primed for paint or other surface treatments. Unlike drywall installation, which focuses on hanging the panels, drywall finishing is a more labor-intensive stage that demands a meticulous approach to detail, including sanding, taping, and multiple coat applications.
The Multi-Layered Process of Drywall Finishing
To achieve a polished, professional finish, drywall finishing requires a series of steps, each contributing to the refinement of the wall surface. The following stages outline the procedure in meticulous detail:
1. The Art of Seaming: Taping and Bonding
The first step in drywall finishing involves taping the seams between drywall panels. Properly taping these seams is essential to create a secure bond for the joint compound and prevent future cracking. Paper tape, when applied with a thin layer of compound beneath it, offers superior strength and flexibility. Alternatively, fiberglass mesh tape, while self-adhesive, necessitates the careful application of compound to ensure an even finish.
It is crucial to apply the tape evenly and ensure it adheres securely without creating air pockets or wrinkles. The tape will act as the foundation for the subsequent layers of joint compound, ensuring structural integrity and preventing visible seams from showing through.
2. First Coat of Joint Compound: The Initial Bonding
Once the tape is in place, the first coat of joint compound is applied, which serves as the bonding layer. This initial coat should be applied with precision, ensuring it adequately covers the seams and screw holes. The first coat is critical, as it establishes the foundation for the subsequent coats and helps create a smooth transition between the tape and the drywall surface.
Utilize a 6-inch drywall knife to apply the compound generously but with a controlled hand. The goal is not to over-apply but to provide just enough material to create a seamless bond. Allow the compound to dry thoroughly, as this will be the cornerstone for a flawless finish.
3. The Refining Process: Second Coat of Joint Compound
After the first coat has dried, the second coat is applied, this time with a wider drywall knife (10-12 inches). The purpose of the second coat is to fill any voids left by the first layer and to further smooth out the surface. This coat should be feathered out towards the edges, ensuring that it blends effortlessly into the surrounding drywall. This process is essential for achieving an even, level surface that won’t reveal the seams once painted.
At this stage, the compound should be applied with care to avoid over-saturating the area and creating lumps. Allow sufficient drying time before proceeding to the next stage.
4. Final Finishing Coat: Creating the Smoothest Surface
The final, or finishing, coat of joint compound is where precision and expertise come to the forefront. This thin, almost translucent layer should be applied with a 12-inch drywall knife, ensuring that it is spread evenly and smoothly across the surface. The key is to achieve a flawless, even finish with no noticeable seams, screw holes, or imperfections.
Feather the edges of the compound meticulously to create a seamless transition between the compound and drywall. Once this coat has dried completely, lightly sand the surface to remove any minor irregularities and prepare the surface for priming.
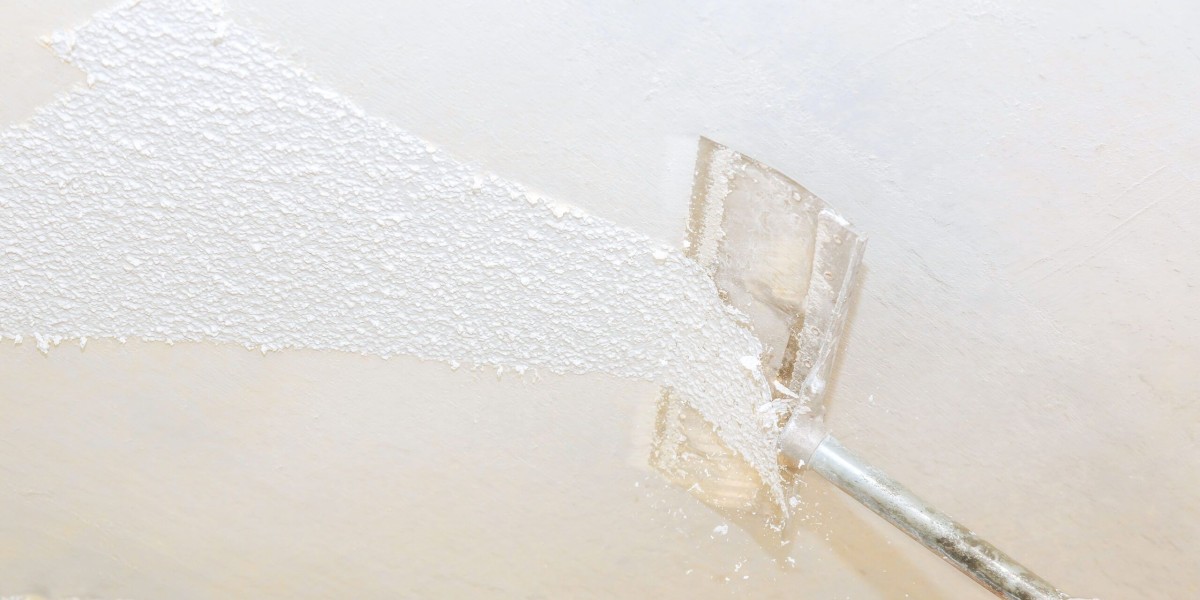
5. Sanding: Perfecting the Surface
Sanding is the pivotal stage in achieving a pristine, smooth finish. Between each coat, fine-grit sandpaper (preferably 220-grit or finer) is used to smooth out any irregularities and feather the edges of the joint compound. The goal is to create a surface that is as level and uniform as possible.
Sanding should be done gently, as aggressive sanding can damage the drywall or remove too much compound. Use a sanding block or pole sander to ensure an even application of pressure, and always wipe down the surface afterward to remove any dust before applying subsequent coats.
6. Priming and Painting: The Finishing Touch
Once the joint compound has dried and been sanded, it’s time to prime the drywall. A high-quality drywall primer is essential for sealing the surface and ensuring proper paint adhesion. The primer also helps to smooth out any remaining imperfections and prepares the surface for the final coat of paint.
Once the primer has dried, you can apply your paint of choice, ensuring that each coat is smooth and uniform. A well-finished drywall surface will provide the perfect canvas for any decorative wall treatment.
Essential Tools for Drywall Finishing
To execute a flawless drywall finish, the proper tools are indispensable. Here is a list of essential tools for the job:
- Drywall Knives: A set of knives, ranging from 6 to 12 inches, is essential for applying joint compound with precision.
- Mud Pan: A container for holding joint compound while applying it to the seams.
- Tape: Paper or fiberglass mesh tape, used to seal seams between drywall panels.
- Joint Compound: A smooth paste used to cover seams and imperfections.
- Sanding Equipment: A pole sander or sanding block with fine-grit paper is necessary for smoothing each layer of compound.
- Primer and Paint: A drywall primer is essential for sealing the surface before painting.
Key Considerations for Optimal Drywall Finishing
- Patience is Key: Drywall finishing is a process that requires time and attention to detail. Rushing through any of the steps can result in uneven surfaces or visible imperfections.
- Thin Layers Are Essential: Apply joint compound in thin, even layers. Overapplying will result in excessive sanding and an uneven finish.
- Proper Drying Times: Allow sufficient drying time between each coat of compound to ensure proper adhesion and prevent cracking.
Conclusion: Achieving Perfection in Drywall Finishing
Drywall finishing is an intricate process that requires both technical skill and artistic precision. By adhering to the steps outlined in this guide and using the right tools, you can achieve a flawless, professional-grade finish that will enhance the aesthetic appeal and structural integrity of any space. With patience and practice, you can master the art of drywall finishing and ensure your walls are the perfect backdrop for paint or other treatments.